We were stationed in England when I made a Union Jack wall hanging quilt. If I remember it right I started making it in the summer of 2010. I was so frustrated not being able to find a pattern online. A friend, Luzette, sent me one as she knew I've been searching. She sent a pattern right after I made the quilt block :)
It took me over two years to make a pattern, and so here it is!
I hope you enjoy learning the quilt block pattern I made.
 |
You will need the following:
4 pcs charms (5 x 5 fabrics)
66" x 1 1/2" strip
2 pcs 66" x 1" strips |
 |
Rule of thumb: Cut selvages off before we begin.
I had to change color combination on the strips if you notice. The stripes didn't blend well with the floral prints :-) |
 |
| Cut your 5 x 5 fabrics into half triangles. These will make 8 half triangles total. |
 |
Start sewing 1" strip to 1 1/2" strip. I used 1/8 seam allowance for the purpose of showing more fabric on the right side.
|
 |
| Then sew the other 1" strip on the opposite side of the 1 1/2" strip. |
 |
Press open the fabric.
This is how much of the purple fabric is showing using a 1/8" seam allowance. |
 |
| Now
take one of the half triangles and place it on your strip as shown on
the photo. Leave an inch space from the top end of the strip. |
 |
| Then
begin sewing. Normally, I do not backstitch when I sew quilt pieces
together, but I recommend using the backstitch function of your sewing
machine to seal the edges of the half triangles. |
 |
| Then sew the other half triangle parallel to the first. |
 |
Press open. I always think it looks like a kite :-) |
 |
| Onto the next pair. Same step as in the first pair. |
 |
| Press open , and now the second pair is done. |
 |
| Third pair of half triangles. Remember to leave a 1 1/2" gap between each pair you sew together. |
 |
| This is how I've sewn my pairs together, notice the gaps in between each pairs? Remember to set aside the remainder of the strips for finishing the block. |
 |
Another view.
Then we will cut these pairs separate from each other to make 4 small
blocks. Set aside the remaining strip for the next steps. |
 |
| Just showing where I got my strips from, a Gabrielle jelly roll. |
 |
| This is how the pairs look after they're cut into four. Refer to top and bottom photos. | | | |
|
 |
| Squaring up done! |
 |
Bottom and Top pair sewing instruction:
Measure the height of the gap between the two blocks. Then cut that
measurement from the remainder of your strip you have set aside. |
 |
| The pre-measured strip should close the gap between the two blocks. |
 |
| Both TOP and BOTTOM have been pre-measured. |
 |
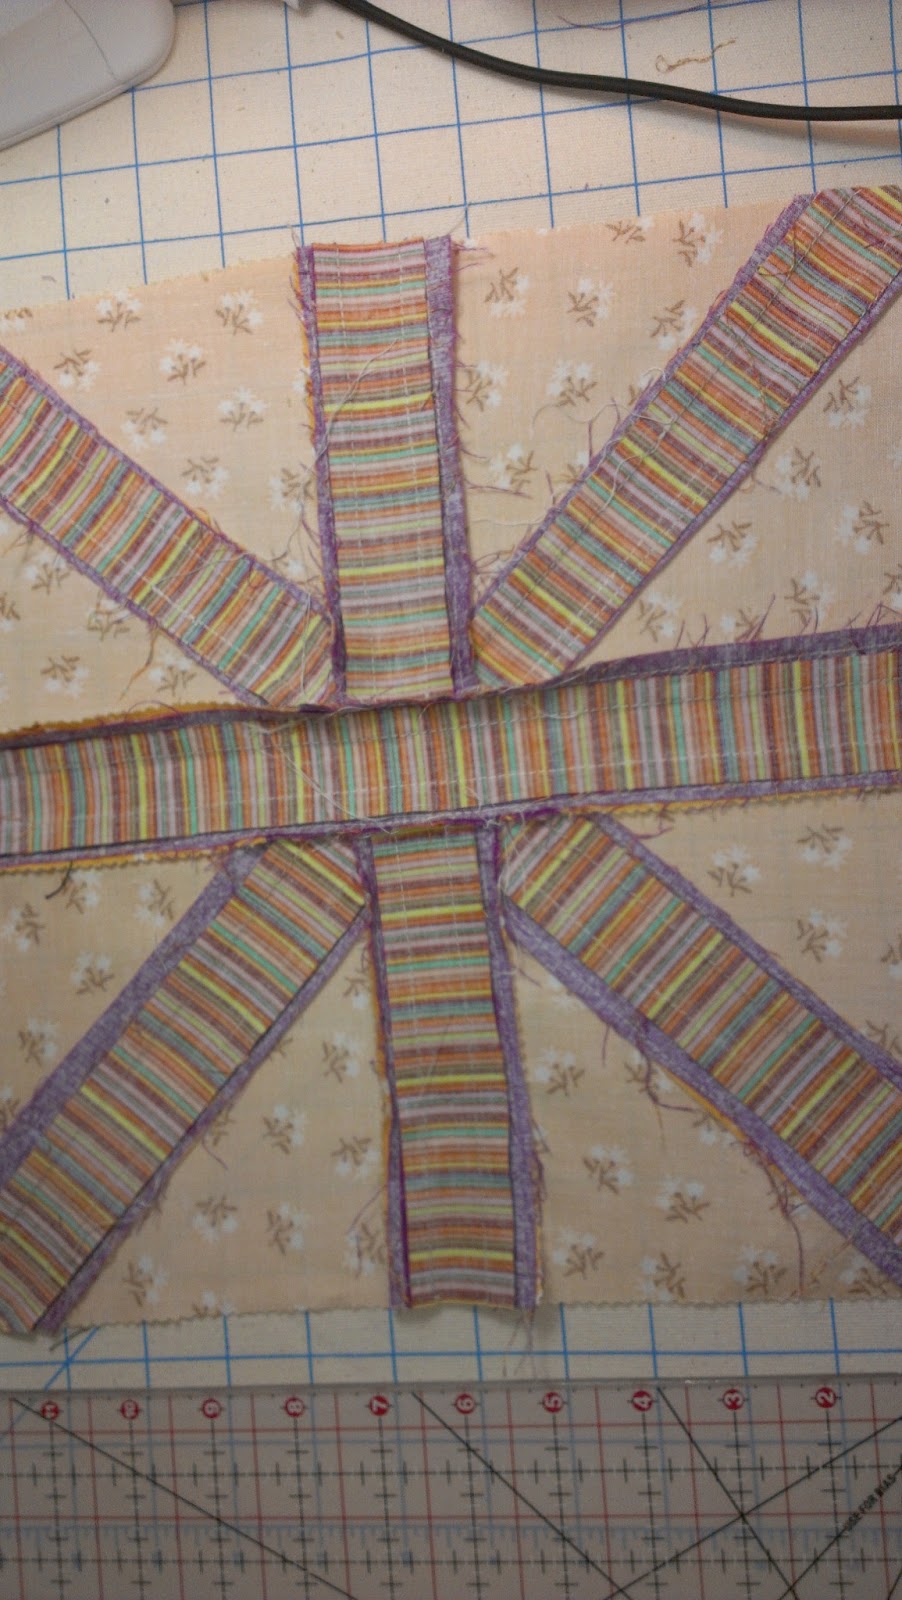
| Now we will measure the strip for the middle gap where you find the marker. |
 |
| Strips are all pre-measured and ready to for sewing. |
 |
| Let's start with the top pair |
 |
| Press open from the back. This is very important in sewing your pieces together so as not to create folds. |
 |
| Now let's finish sewing the top pair. |
 |
| Press open the fabric on both sides. |
 |
| This is the finished top portion of the quilt block. |
 |
| Now we are sewing the lower portion. |
 |
| Again, press open on both sides before sewing the other pair. |
 |
| Bottom portion of the quilt block done! |
 |
| Set the middle strip on the top portion. |
 |
| Start sewing. |
 |
| I had a boo-boo! As I was sewing a created a fold in the back. My BFF is always on the rescue. The seam ripper! |
 |
| Rip the seam open to fix the fold. |
 |
| Sew again. Make sure you have closed the stitches with your machine's backstitch function). |
 |
| Finish off. |
 |
| Press to open seams. Now the top is done. |
 |
| Place the bottom on the top portion right sides together so that the middle strip is aligned from top to bottom. |
 |
| Check the alignment. |
 |
| After checking alignment, pin the top and bottom portion |
 |
| I have pinned my top and bottom but I have another issue to solve here. This will affect my seam length. So I drew a line with my disappearing ink. |
 |
| Top and bottom are pinned together and at the middle so it can guarantee a perfectly aligned strip. |
 |
| I drew the line with my disappearing ink marker from top.... |
 |
| ...to bottom. |
 |
| Stitch, and stop before you get to the pin. DO NOT let your presser foot go over the pin for the love of your machine! |
 |
| Again, letting go of the pin before I proceed. |
 |
| Press open |
 |
| Seams are perfectly pressed open without stretching the fabric. |
 |
| Time to square up |
 |
| Square up ALL sides where possible |
 |
12 x 12 (approx) finished block
Now you can start adding the sashing/borders according to how you want it. |
Until next tutorial ♥


No comments:
Post a Comment